Conduct an inspection on your phone or tablet
When you start the app, initially you’ll see no inspections, of course. Tap the hamburger icon in the top left-hand corner (three horizontal lines) and then select Documents. Then tap the refresh icon in the top right-hand corner (two arrows in a circle). This will load the list of inspection documents.
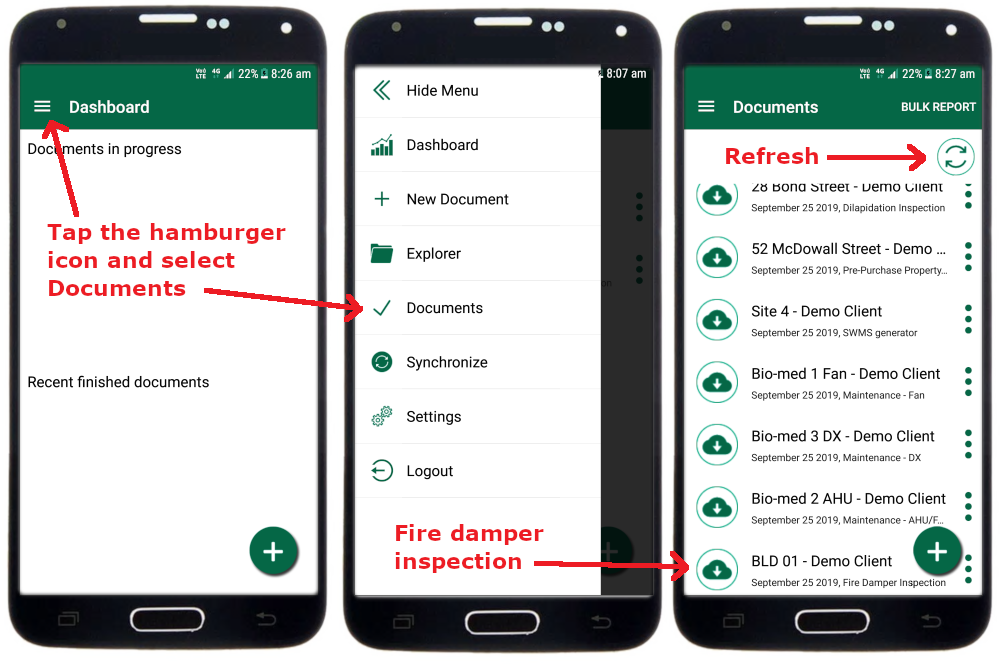
Your starter pack includes the following inspection documents:
- BLD 01: A fire damper inspection.
- Bio-med 1 Fan: A maintenance inspection of fans.
- Bio-med 2 AHU: A maintenance inspection of AHUs and FCUs.
- Bio-med 3 DX: A maintenance inspection of DX systems.
- 52 McDowall Street: A pre-purchase property inspection.
- 28 Bond Street: A property dilapidation report.
- Site 4: A WHS SWMS generator.
Tap one of them to download. Let’s do the fire damper inspection - the one called “BLD 01” at the bottom of the list. Once it’s downloaded the icon will change from a cloud to a circle - tap it then to open it.
This fire damper inspection has the following sections:
- Job Information: General information such as job number, inspection date, street address and so on.
- BLD 01 Level 2: Fire dampers on level 2.
- BLD 01 Level 3: Fire dampers on level 3.
- BLD 01 Level 4: Fire dampers on level 4.
- Other Defects: A template for miscellaneous defects.
- Floor: A template for adding levels on-site.
Tap the “BLD 01 Level 2” section to enter it, and you’ll see a list of fire damper subsections. Tap any one of these to open the inspection form.
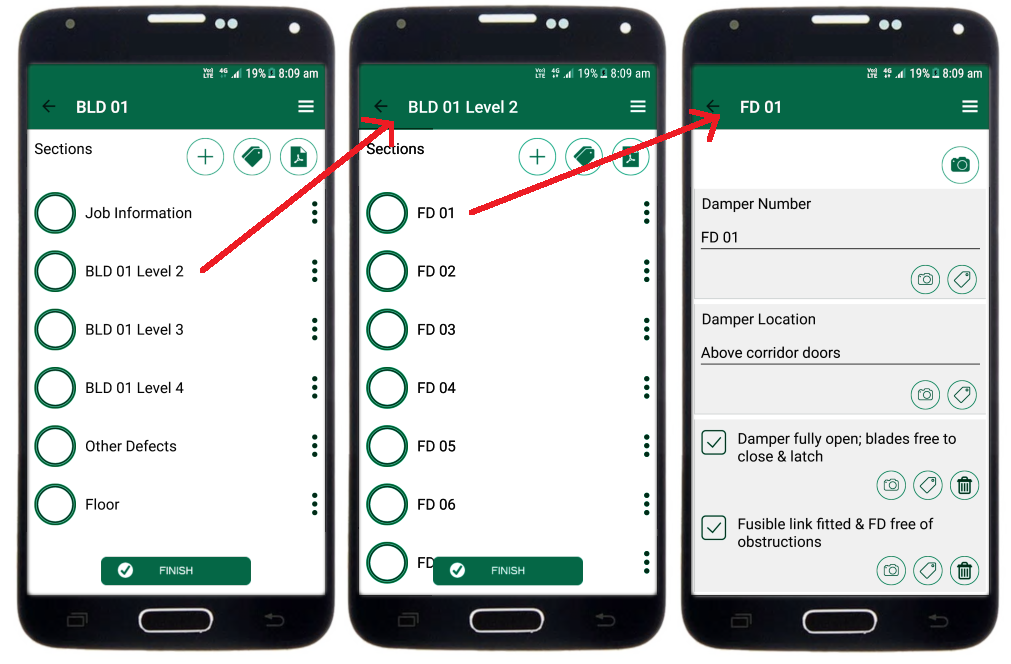
This form has fields for general damper information, five checkboxes for the main body of the report, and other checkboxes for defects and inspection year. The fifth main checkbox, “Subject to recent work or never inspected previously”, is a trigger for a subform – if you tap on it then you’ll be taken to the subform where you can record information relevant to new or modified dampers.
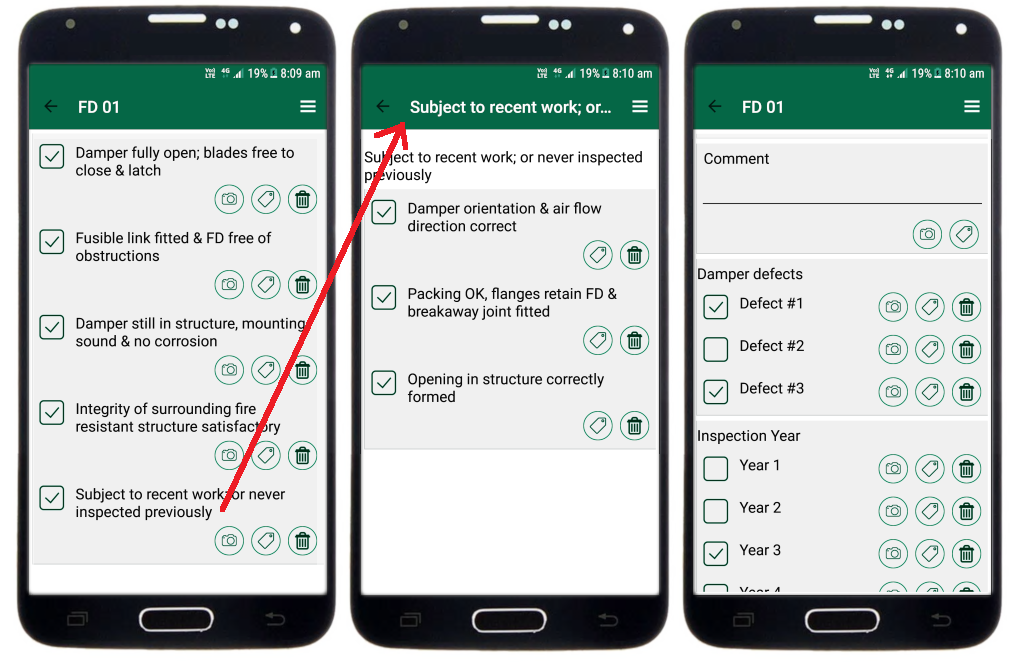
On any item you can take any number of photos by tapping the camera icon. The photos will be automatically associated with the item. If you want a general photo of the section, not associated with any particular item, then tap the camera icon in the top right-hand corner of the form.
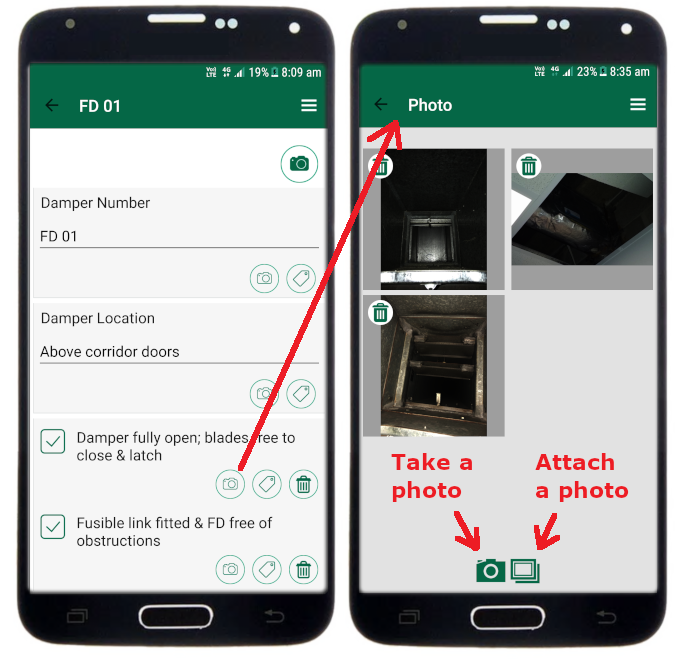
If you want to attach a photo that you’ve taken in some other app, then tap the attach icon. This will take you to your photo gallery, where you can browse and select the photo you want.
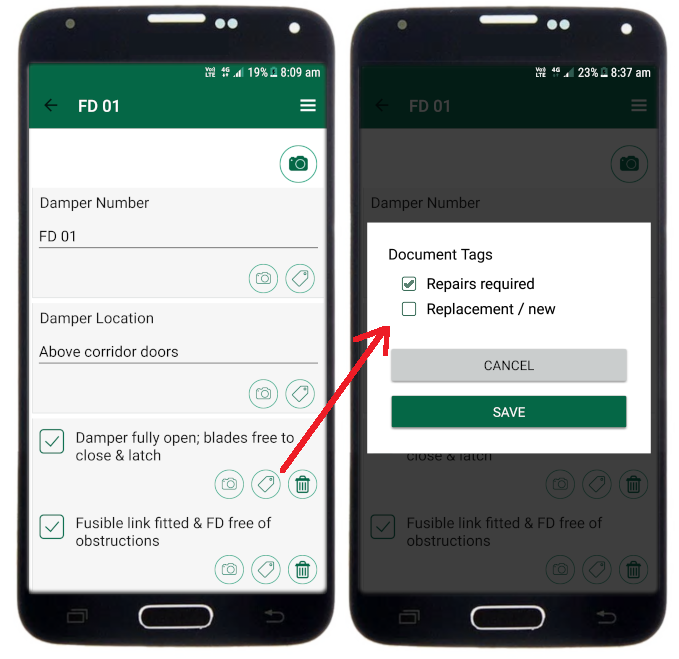
You can also attach tags to items. In this fire damper inspection we’ve defined two tags – “Repairs required” and “Replacement / new” – but of course you can define your own tags. Tagged items can be given special treatment in the final report, such as being highlighted or listed in a summary.